PHotogram/Rayographs
What is a Photogram/Rayograph
A photogram is a photographic image made without any form of camera by placing any objects onto the surface of a photographic paper and then exposing it to light. The usual outcome is a negative shadow image that shows a wide rang of in tone that depends upon the transparency ( see through) of the objects used. Areas of the paper that have received no light appear white ; those exposed through transparency or semi - transparent object appear grey
A photogram is a photographic image made without any form of camera by placing any objects onto the surface of a photographic paper and then exposing it to light. The usual outcome is a negative shadow image that shows a wide rang of in tone that depends upon the transparency ( see through) of the objects used. Areas of the paper that have received no light appear white ; those exposed through transparency or semi - transparent object appear grey
How To Make a Photogram

1
begin by setting your enlarger to shed an area of light that is slightly larger than the size of your 8 x 10 piece of photo paper.
begin by setting your enlarger to shed an area of light that is slightly larger than the size of your 8 x 10 piece of photo paper.

2
Next, lay out your photo paper under the enlarger where the light will shine down.
Next, lay out your photo paper under the enlarger where the light will shine down.

3
Then arrange your objects onto the paper in any fashion.
Then arrange your objects onto the paper in any fashion.

4
Switch the enlarger on and expose the paper for approximately 5 seconds.
Switch the enlarger on and expose the paper for approximately 5 seconds.
5
Finally, carefully remove the objects and you're ready to develop. and then you will end up with this image
Finally, carefully remove the objects and you're ready to develop. and then you will end up with this image

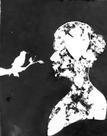
Photograph #1 When we entered the dark room we was shown what to do. after we was shown what to do we was told to have two experiments with light sensitive paper and me and jack put some objects onto the paper and we put some head phones onto the paper and a oster caed and some keys along with the end of a light blob . and then we developed it in the developer stopper and fixer and then rinsed it in water. witch gave us this image
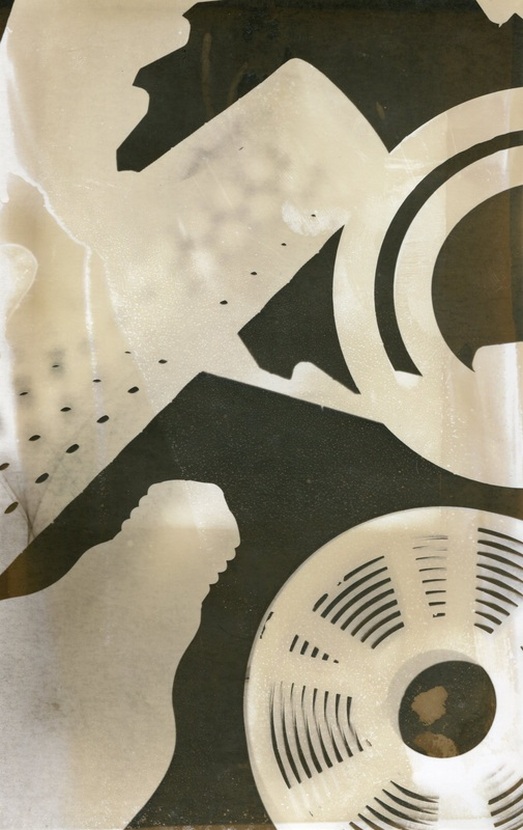
Photograph #2 We tried this again but with a bigger peace of light sensitive paper and we tried the light blob again because it was a good object to use because it come out really niceley in the last picture and we then put a metal coil with a tube with holes in it and then we pit a plastic circle with a lot of gaps in it. and then we developed it in the developer stopper and fixer and then rinsed it in water. witch gave me and jack this image. we made this better by putting more objects into the photo and we was looking for objects witch would be thick, thin and medium. we was a lot more happier for the second attempt
